
Date Night Dinners - It's Halloween Time!
HAPPY HALLOWEEN!
I love Halloween. It is no doubt in my list of top favorite holidays, if not number one. I don't know what it is that draws me to the traditions, but each year I revert into my elementary school self, wanting to dress in costume, go pumpkin picking and then carving, parade around and collect (or nowadays, give out) candy, and see what everyone else chose to dress up as. When the television airings of my all time favorite halloween movie, Hocus Pocus, begin to pop up, I know it is my time of year. The leaves start changing color and falling to the ground and the air begins to fill with the smell of fall as small breezes soar by. Besides the creeping cold weather, I cannot get enough of it.
This year was not any different. The red, orange and yellow leaves have outnumbered the green, and leaf jumping piles have begun to form. Pumpkin everything has been set out in the stores and I have been guiltlessly indulging in everything from pumpkin M&Ms to pumpkin cinnamon rolls to my go to fall drink of pumpkin spice chai tea lattes.


My mom and I picked out three magnificent pumpkins for carving this year and I could not wait. She even got a new pumpkin carving power knife; it was almost as great as it sounds, besides getting very, very easily clogged. My friends and I gathered last week for our traditional pumpkin carving party, and the results were just as good as ever. I created a cinderella themed pumpkin while my friends carved more traditional, but still amazing ghoulish like creatures.

Unfortunately, Brenden was stuck working and couldn't partake in this years pumpkin festivities. Never fear though, as I said, I picked out three pumpkins, so I still had two left for us to carve together. I was even proactive and cleaned out all of the pumpkin guts during the original pumpkin carving party to lessen the work and mess and increase the fun during my pumpkin carving session with Brenden. Well turns out it wasn't such a smart decision. Due to the rain we had and few unusually warm days in the past week, the pumpkins began to rot...from the inside! So while I though that they were still looking great and feeling firm, when we opened our pumpkin lids to begin carving, we were startled by the gruesome sight of moldy gray fuzz an inch high. Bye, bye pumpkins. We were both pretty bummed. Luckily, our date night dinner idea cheered us right back up, as it was chosen in Halloween spirit.


Our stomachs were now rumbling after so much creativity and effort carving; it was time to start the actual meal. Brenden began to cook the chicken as I prepped the veggies and fajita seasoning. I chopped the onions, shredded the cauliflower and combined the seasonings; I was already excited.

We made our own fajita seasoning mix, rather then store bought, based off of the blog we got the stuffed pepper recipe from. It went as follows: In an air tight container, combine 4 tsp chili powder, 2 tsp paprika, 2 tsp salt, 1 tsp cumin, 1 tsp garlic powder, 1 tsp onion powder, 1/2 tsp dried oregano, and 1/4 tsp cayenne. It made a ton, and we are excited to use the seasoning in the future.

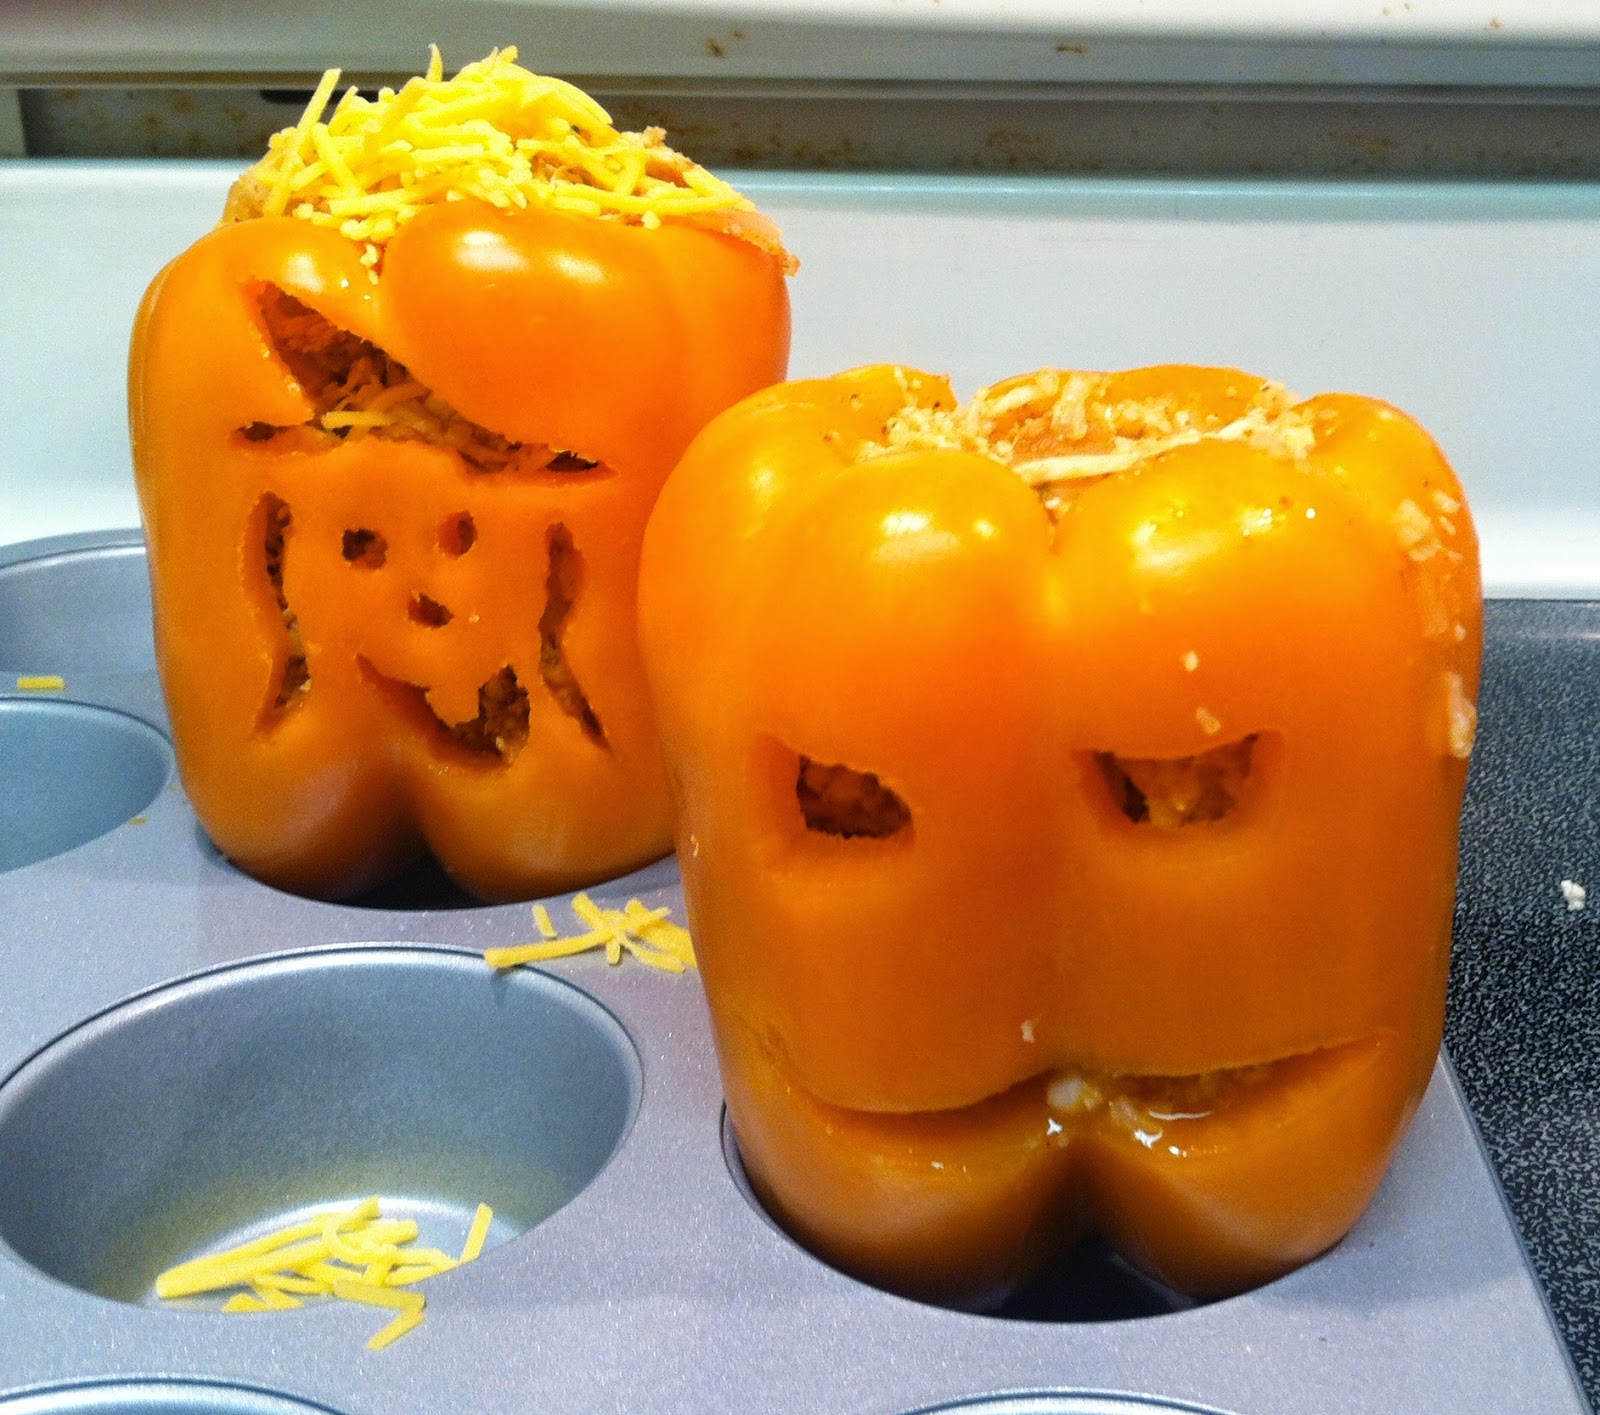
When the chicken was cooked through, Brenden let it cool a bit before shredding. While he did that I started cooking the onions and then the shredded cauliflower rice, yum. Then we added the shredded chicken, the fajita seasoning and some water to get the spice to throughly cover all of the ingredients. And once everything was combined and heated, we stuffed our peppers with the filling, layered them with cheese, and popped them in the oven to wait in anticipation. It smelled and looked really good.


We only decided to make two stuffed peppers instead six as the recipe called for so we had a lot of excess filling. But it was fine because it tasted good and was easy enough to eat on its own. Brenden was really digging the filling. He thought it tasted great and was seasoned perfectly, but he warned me that he thought I would think it was a little spicy. He was spot on. It was a bit spicy for my taste, but it was nothing a little extra cheese couldn't fix. My stuffed pepper turned into more of a fajita lasagna stuffed pepper, with the amount of cheese I layered in between, but it was perfect for me. We both spread a little excess filling on our plate since the peppers were so big, and the rest of the excess filling got packed to have as leftovers for lunch, yumm-o.
Jack-o-Fajitas: Stuffed Peppers
Recipe adapted from holisticallyengineered.com, Chicken Fajita Stuffed Peppers

- 1 lb chicken breasts
- 1 medium yellow onion, chopped
- 1/2 head medium to large cauliflower
- 2 Tbsp fajita seasoning (see recipe above)
- 2/3 cup water
- 2-6 bell peppers (amount depends on how many you want to stuff)
- Cheddar cheese as desired, shredded
Directions
- Cut off the tops of the bell peppers and the remove seeds. Carve the peppers as desired.
- Place peppers on a cookie sheet or inside muffin tins and set aside.
- Cook the chicken breasts fully in a skillet on medium heat.
- Once cooked, remove from skillet and let cool.
- While the chicken is cooling, cut the cauliflower into small florets and add to a food processor.
- Pulse or shred the cauliflower until it is of rice like size. Set aside.
- Preheat the oven to 350 degrees Fahrenheit.
- Next, add the onions to a large skillet on medium heat, sprayed with cooking spray.
- Cook for 3-5 minutes or until onions begin to get tender.
- Add the cauliflower rice to skillet and heat for another 2-3 minutes.
- While the onion and cauliflower is cooking, shred the chicken.
- Add the shredded chicken to the onion/cauliflower skillet.
- Stir in the fajita seasoning and water until everything is coated, about 1-2 minutes.
- Add the chicken mixture to the empty centers of the peppers, layering or topping with cheese as desired.
- Place the peppers in the oven for 20-25 minutes.
- Remove from oven and let cool until able to handle.
- Admire your work, serve, and enjoy!

0 comments: